Saturday, May 30, 2020

红豆牛奶冰淇淋 Red Bean Milk Ice Cream


红豆牛奶冰淇淋 Red Bean Milk Ice Cream
红豆加盖过豆子的水,用高压锅煮熟。
煮牛奶水要不停地搅拌以免糯米粉粘成块状...
经典红豆Popsicles
开吃咯,这是考验天使们耐心的冰淇淋啊,呵呵!
想把婆妈心里“最原始”的古早味红豆冰淇淋留给天使们,她们口中的冰淇淋🍦很少会是这个模样的。材料简单,有了高压锅更是省时省力。好奇心重的她们只要有关于吃的,大多数都很赏脸而且还给了我很多个👍,不过这次一直问为什么这种冰淇淋要吃很久的呢...(等ice cream 融化等到她们累喔😓)哈哈哈哈哈!

红豆牛奶冰淇淋 

{材料} 红豆和清水适量,牛奶300毫升,红糖30-40克,糯米粉25克(也可用玉米淀粉代替)。

{做法} 

1. 红豆洗净,加入适量刚好盖过红豆的清水, 放入高压锅煮熟即可备用。(或是红豆提前一晚洗净泡水,隔天加入适量盖过豆子的水煮到红豆熟,请煮到豆子开花哦。) 

2. 锅中倒入牛奶,红糖和糯米粉以小火慢煮,不停的搅拌至比较浓稠就可以了。 

3. 煮好的牛奶水和煮好的红豆搅拌混合均匀,倒入模具中,放入冰箱冷冻4-6小时或隔夜即可享用啦。

Red Bean Milk Ice Cream 

{Ingredients} Some red bean and water, milk x 300ml, brown sugar x 30-40g, glutinous rice flour x 25g (Can be replace by corn starch). 

{Directions} 

1. Wash read bean, add in the water just enough to cover the bean, cook in pressure cooker till cooked. (Alternately please soaked red bean overnight, next day cook the red bean with right amount of water that just cover the bean till cooked.) 

2. In a pot, slow cook the milk, brown sugar and glutinous rice flour till thickening. 

3. Mix the milk with cooked red bean till well combined, pour into the moulds, freeze for 4-6 hours or overnights before enjoy it.

Saturday, May 23, 2020

酥皮葡式蛋挞 Puff Pastry Egg Tarts

酥皮葡式蛋挞 Puff Pastry Egg Tarts 


蛋挞液轻轻的搅拌均匀,然后筛过3-5次直到没什么泡泡,放入冰箱备用。


用一点融化牛油抹好蛋挞模具,才把蛋挞也从冰箱取出轻轻搅拌一下即可。

即用酥皮室温回温15-20分钟即可卷起切成6份,准备捏挞皮。
蛋挞皮准备好,倒入蛋挞液即可准备烘烤。


烤25-30分钟左右,下午茶就准备好了!

这款材料少到不行的快手下午茶,酥皮葡式蛋挞真的真的真的太容易解决天使们的嘴馋!不知她们长大后知道这过程其实很简单,不懂那时候的她们依然会像现在那么“仰慕”妈咪吗?!说真的,凡事果然是需要一个“动力”,她们的“赏识”成全了我的坚持不懈!😂🤣😋 

酥皮葡式蛋挞

{材料} 牛奶100克,红糖20克,鸡蛋黄2个,Kawan酥皮5块。 

{做法} 

1. 将牛奶隔着热水把红糖搅拌至糖融化,待5分钟凉后加入蛋黄轻轻搅拌均匀,过筛3-5次即可放入冰箱备用。 

2. 模具涂上薄薄一层融化牛油,Kawan酥皮从冷冻室拿出回温15分钟后卷起切成六份,放入抹了油的模具。这时可以把蛋挞液从冰箱拿出备用(家里没蛋挞模具,用杯子蛋糕模具也行。) 

3. 用两只大拇指努力把蛋挞皮捏好,底部要薄用叉子叉点小洞,倒入蛋挞液八分满即可。

4. 预热烤箱210°C, 先烤20分钟左右,如果表面太上色就换去200°C再烤5-10分钟就好了。(烤箱温度得自行拿捏哦!)

Puff Pastry Egg Tarts 

{Ingredients} Milk x 100g, brown sugar x 20g, egg yolks x 2, Kawan brand puff pastry x 5 pcs. 

{Directions} 

1. Mix milk and sugar use hot water double boiler method to dissolve the brown sugar in a bowl, let it cold for 5 mins only follow by add in egg yolks to continue mix them well, filtered 3-5 times to get smooth or silky mixture that with no bubbles before to keep aside in refrigerator. 

2. Grease the mould with melted unsalted butter very lightly, thaw the puff pastry at room temperature for 15 mins, roll up and cut into 6 pcs follow by to put in the mould. Take the egg mixture out from the refrigerator to get ready for use. (If no special egg tarts mould, can use cupcakes mould like me.) 

3. Use your thumb to shape the egg tart shells, use fork to make some tiny holes before pour in the egg mixture, just fill about 80%of the tart shells. 

4. Preheat oven 210°C, baked for 20 mins and swich to 200°C to bake for 5-10 mins or till cooked. (Oven temperature adjust accordingly.)

Friday, May 22, 2020

烤箱版烤紫薯条 Oven Baked Purple Sweet Potato Fries


烤箱版烤紫薯条 Oven Baked Purple Sweet Potato Fries 
切好及泡好水的紫薯条要仔细每条抹干水份。
在纸袋加入"油酥"和控干水分的紫薯条,抖动让"油酥"能均匀地裹住每根紫薯条...
盖上一层隔油纸,送进烤箱烤35分钟左右。
紫薯买多了,烤紫薯条来当下午茶吃。简单易做,就只是翻面时有点儿“麻烦”,因为烤箱温度高,“翻面”翻到脸红耳热的,不过成品怪好吃的哟😋😋😋

烤箱版烤紫薯条

{材料} 紫薯3粒(洗净去皮,切条状泡水洗净表面淀粉),盐适量(烤好才撒入,可不放。)

{抹表面用} 玉米淀粉1汤匙,橄榄油3汤匙盐,混合均匀备用。

{做法}

1. 切好的紫薯条泡水30分钟左右,捞起沥干水份, 多余的水份一定要用厨房纸巾吸干。

2. 烤盘铺上锡纸后抹上一层薄薄的橄榄油,zip-loc纸袋中放入抹表面用的材料,把控干水份的薯条倒入不停地抖动使每条薯条都沾上油,然后排好。(尽量不重叠!)

3. 放入预热好的烤箱210°C中层,先烤15分钟;然后翻面再烤15-20分钟即可。

4. 烤好,撒上适量的盐,待冷5分钟即可享用。

Oven Baked Purple Sweet Potato Fries

{Ingredients} Purple sweet potatoes x 3 (peel and cut into evenly-sized, soaked in water.), some salt. (will sprinkle on at the very end, optional.)

{Glazing} Corn starch x 1 tbsp, olive oil x 3 tbsp, mix well and set aside.

{Directions}

1. Soak the well-cut sweet potato fries for at least 30 mins; rinse, drain and pat dry with kitchen towels.

2. Baking tray cover with parchment sheet spread a thin layer of olive oil or any other cooking oil, ziploc bag put in the glazing mixture, transfer the fries into the bag and toss evenly to ensure each fries coated with the oil mixture, transfer to baking tray and arrange well. (Do not overlapping if possible!)

3. Bake in pre-heated oven at 210°C for 15 mins first, flip the fries and bake for another 15-20 mins.

4. Remove baking tray from oven, season the fries with some salt (optional), and let it rest
for 5 mins only enjoy it.

Previous: 曼煎糕 Crispy Peanut Sesame Pancake

Friday, May 15, 2020

曼煎糕 Crispy Peanut Sesame Pancake


酥脆薄曼煎糕 Crispy Peanut Sesame Pancake
材料准备中...
一定要筛过面糊,静置至少1小时这样的曼煎糕视觉和味觉效果会大大的提升,呵呵!

很薄又很脆的曼煎糕,心满意足的成果!
目前为止最成功的版本:粉的用量比例就如食谱写的。
用自发粉,粘米粉和玉米粉的薄版酥脆曼煎糕,粘米粉和玉米粉的比例4:1。
成果犹如薄薄版的“厚曼煎糕”
只用自发粉的材料,冷却后口感就会没那么脆,感觉很容易就变软软的。

CMCO(Conditional Movement Control Order )期间连曼煎糕也有机会做,而且还能一而再, 再而三的做了几次来“研究”粉的用量和比例所带出的口感,太爽了!做了几次后,婆妈心得就是看男女人们要什么口感,要酥脆就一定要加粘米粉但玉米粉的用量又不能太多,不然感觉一冷就没了酥脆感(趁热吃就OK)。有机会可能得做一次完全不用玉米粉的看结果怎样...😉☺️😋

曼煎糕

{材料} 自发面粉200克,粘米粉90克,玉米粉10克,食用苏打粉1茶匙,鸡蛋两粒,细红糖70克,玉米油1汤匙,清水420毫升。

{馅料}黑芝麻花生糖粉, 牛油和甜玉米酱适量。

{做法}

1. 先将鸡蛋,糖和清水搅拌均匀后筛入粉料拌均再加入玉米油,静置待发至少一小时。(时间许可,可以考虑2-3小时;不然晚上准备好,隔天早上再煎也行。)

2. 等待发过程时,可以把馅料-黑芝麻花生糖粉准备好。黑芝麻干锅以中小火炒香(一分钟就好)后再加入烤好已去皮的花生和糖放入搅拌机中搅至个人喜爱的口感。

3. 不粘平底锅预热后转小火,不用放油倒入适量的面糊,面糊会起很多小洞洞,撒上黑芝麻花生糖粉,加入甜玉米酱和少许牛油,煎成饼皮呈金黄色即可折半盛起。(重复此步骤直到面糊用完。)

Crispy Peanut Sesame Pancake

{Ingredients} Self-raising flour x 200g, rice flour x 90g, corn flour x 10g, baking soda x 1 tsp, eggs x 2, granulated brown sugar x 70g, corn oil x 1 tbsp, water x 420ml.

{Fillings} Black sesame, peanut, sugar, some salted butter and sweet cream corn.

{Directions}

1. In a mixing bowl, whisk the egg, sugar and water well only sifted in all the flours to ensure all well-combined, follow by pour in the corn oil to mix until get a smooth batter, put aside for proof at least 1 hour. (If got time, can let it sit for 2-3 hours or prepare at late evening for overnight to fry only next morning.)

2. While waiting the proof process, get ready the filling’s ingredient especially the roasted black sesame peanuts. Black sesame stir-fry for 1 mins under medium low heat in a dry pan, add together with the roasted skinless peanuts in a blender to blend with sugar for fine roasted black sesame peanuts filling. (According to personal preference.)

3. Heated non-stick frying pan till hot and turn to low heat, pour in some batter and evenly coated the pan, some small bubbles will be form, sprinkle up the black sesame peanuts filling, follow by sweet cream corn and salted butter, loosen the pancake and fold to half when you see pancake is golden brown. Remember to serve hot. (Repeat this step till all batter is finished.)

Previous: 黑芝麻红糖花生麻薯 Black Sesame Brown Sugar Peanut Mochi (Mua Chee)

Sunday, May 10, 2020

黑芝麻红糖花生麻薯 Black Sesame Brown Sugar Peanut Mochi (Mua Chee)


黑芝麻红糖花生麻薯 Black Sesame Brown Sugar Peanut Mochi (Mua Chee)
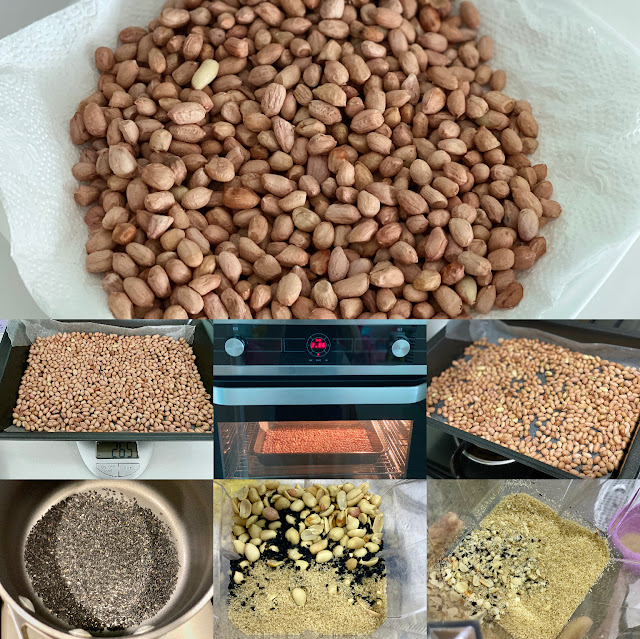
很没空的烤箱,连花生都需要它来烤一烤,哈哈哈...
用黑芝麻,红糖搭配花生碎,想来点特别的滋味...
很简单的15分钟蒸一蒸就快有得吃咯...(怎么平时这时间都挤不出来呢?!因为加上其它材料准备的时间就🤦🏻‍♀️🤦🏻‍♀️🤦🏻‍♀️)
没什么美感,少了葱油酥的点缀,但是一样很好吃呀!(自己做的得捧场,哈哈)

想做很久很久很久的麻糍或叫麻薯(Mua Chee),自己很喜欢吃这类甜食,终于有机会自己动手做的心情犹如终于能再次活出自己的感觉,哈哈哈(虽然有点儿夸张,但身为“婆妈一族”的女人们应该很懂这种珍贵的情绪,CMCO期间暂且放大这类不用为了谁而忙的情绪确实很受用)...每分每秒为自己的快乐而活,能做到想做就能做自己所喜欢的事,不需要压抑,遮盖或等有空时的感觉太太太感恩啦!

黑芝麻红糖花生麻薯

{材料} 糯米粉115克,玉米淀粉25克, 玉米油10克 (用猪油更香), 红糖20克,温水150克,盐少许。

{黑芝麻花生糖粉材料} 花生250克,红糖70克 (50克花生:15克糖的比例,我多做一些因为要做其它婆妈料理,呵呵!)黑芝麻适量(干锅炒香,一分钟左右。)

{做法}

1. 花生洗净,用厨房纸巾吸干水份再用烤箱(不用预热)170°C, 烤15-20分钟左右。冷后去皮和炒好的黑芝麻与红糖用搅拌机搅一分钟或至碎。(口感个人喜好哈。)

2. 将糯米粉和玉米淀粉过筛后加入玉米油和红糖,逐步加入水搅拌成均匀的糊状。

3. 把面糊冷水入蒸锅蒸12-15分钟左右(面糊全部变透明即可),出锅用筷子搅拌几下,用一个保鲜袋,里面倒入一点玉米油,把蒸好待稍微凉后的糯米面团全部装进袋子里,轻轻揉约一分钟。

4. 取出后,切小块状后将小麻薯们都均匀地裹上黑芝麻花生糖粉,即可享受啦。

Black Sesame Brown Sugar Peanut Mochi (Mua Chee)

{Ingredients} Glutinous rice flour x 115g, corn flour x 25g, corn oil x 10g (use pork lard if got), brown sugar x 20g, warm water x 150g.

{Roasted black sesame, peanuts ingredients} Peanuts x 250g, brown sugar x 70g, (ratio - 50g peanuts: 15g sugar, I do more as want to use for other recipes.), some black sesame (dry pan to stir-fry for 1 min.)

{Directions}

1. Washed peanuts , dry with kitchen paper and roast with oven (don’t need preheat) 170°C, bake for 15-20mins, let it cool only remove the skin and a mix with black sesame that done stir-fry to blend well together with brown sugar in blender for about 1 mins. (According to personal preference.)

2. Then, mix the sifted glutinous rice flour, corn flour, corn oil, brown sugar together with slowly add in water to form a batter.

3. Pour the batter into a bowl to steam for 12-15 mins or when the batter is completely cooked, stir with chopstick when done steamed, pour a little oil in a plastic bag, drop the cooked paste inside the bag and knead well for about 1 min.

4. Remove it out from the bag, roll and cut it into bite size to coat it evenly with the peanut sesame powder, serve and enjoys!

Previous:榴莲海绵蛋糕 Durian Sponge Cake

Friday, May 8, 2020

榴莲海绵蛋糕 Durian Sponge Cake

榴莲海绵蛋糕 Durian Sponge Cake
很幸运可以吃到那么多品种的榴莲,最爱还是猫山王!
选了坤宝红的榴莲肉来做蛋糕,因为果肉很绵密。
全蛋打发的海绵预拌粉蛋糕是比较容易操作,水量控制好成功率很高,呵呵!
最后加融化牛油后,以中至慢速搅拌大约一分钟或至面糊轻和感觉蓬松即可。
把面糊倒入铺了烘焙纸的烤盘上。
加了适量的黑芝麻,送入烤箱烤30分钟左右即可。(忘了预先加点清水防止表面裂开🤦🏻‍♀️)


可以吃到榴莲果肉的海绵蛋糕,所以榴莲泥随意用汤匙叉挖出核就好。
榴莲季节总是很想至少吃一次这令人又爱又恨的果王!今年很幸运,季节开端就得以享用猫山王,红虾,坤宝红,D600,D11和808品种的榴莲,太过瘾了🥰😋!吃过很多次但拿来做蛋糕是第一次尝试,MCO期间太“勤劳”家里没了自发粉,刚好有剩一盒海绵蛋糕预拌粉,就没想很多立马就准备,毕竟恢复“正常”生活方式后或许会少了很多这样想做就做的机会啦!

榴莲海绵蛋糕

{材料} 海绵蛋糕预拌粉380克,鸡蛋5粒,榴莲泥180克,清水70毫升,融化无盐奶油120克(隔热水融化)。

{做法}

1. 把海绵蛋糕粉和鸡蛋以中速搅拌大约3-5分钟或至均匀,加入榴莲泥和水继续搅拌至面糊蓬松或看起来感觉很轻。

2. 然后,加入融化牛油以低速继续搅拌至均匀即可。(大约一分钟左右.)

3. 把面糊倒入已铺上放油纸的烤盘,洒适量的黑芝麻用筷子稍为搅拌一下,预热烤箱170°C, 烤30分钟左右或至熟。(烤箱温度得自行拿捏哦!)

***记得预热烤箱前先在烤箱底层倒入200毫升的清水,预防蛋糕表面裂开。

Durian Sponge Cake

{Ingredients} Sponge cake mix x 380g, eggs x 5, fresh durian meat x 180g, water x 70ml, melted unsalted butter x 120 (melting with hot water under double boiler method.)

{Directions}

1. Mix the sponge cake mix with the eggs at medium speed for about 3-5 mins, add in durian meat and water to continue mix until batter is fluffy or light.

2. Then, add in butter and mix at low speed until well combined. (About 1 min.)

3. Pour the batter into the cake pan with grease proof paper, sprinkle some black sesame on top of the batter and mix a round, preheat oven 170°C, baked for 30 mins or when the cake tester inserted in the centre of cake come out clean. (Oven temperature adjust accordingly.)

***Before preheat the oven, remember pour in 200ml water at the bottom of oven, to have a better or nice cake surface.

Previous:滑蛋伊面 Creamy Egg Sauce Yee Mee

Wednesday, May 6, 2020

滑蛋伊面 Creamy Egg Sauce Yee Mee


滑蛋伊面 Creamy Egg Sauce Yee Mee
善用家里有的材料来完成想做就做的料理之一。
先把面炒起来,放入电饭锅保温。
接着煮滑蛋汤汁...
加栗粉勾芡后,汤汁滚时快快把蛋液分散倒进锅里就可以看到蛋花啦!
天使们对比较“重”口味的伊面赞不绝口,呵呵!
一天午晚餐就这样搞定啦,吃不完的面和汤汁分开放进两个锅中,要吃前30分钟记得按下保温键回热再享用!

河粉,粿条/大板家里没有,但有我爱吃的“伊面”。很久没有煮这类的家庭味啦,这样的份量第一次挑战还不赖。婆妈版料多多的滑蛋伊面,难以置信能完成地如此“美观”,哈哈哈😂

滑蛋伊面

{材料}伊面6块(用加了一点油的沸水川烫大约2分钟捞起沥干备用),蒜碎适量,小红葱碎适量,干贝3粒(切片状),海鲜豆腐和素明虾适量(切片),鸡肉碎适量(用一点酱油,胡椒粉和芝麻油腌5分钟左右),杏鲍菇丝,高丽菜丝,花椰菜(洗净泡盐水后,先用加了点油和盐的沸水川烫2-3分钟,捞起沥干备用),胡萝卜丝,鸡蛋4粒(加点芝麻油和胡椒粉打散备用),栗粉水(3汤匙栗粉和3汤匙清水搅拌均匀备用)

{调味料A-炒面}黑酱油5汤匙,酱油2汤匙,清水2汤匙。

{调味料B-汤汁}清水800-1000毫升,鲍鱼汁1汤匙,绍兴酒1汤匙,酱油2汤匙,黑酱油几滴,红糖1茶匙,芝麻油1茶匙,胡椒粉少许。(搅拌均匀成综合汤汁备用)

{做法}

1. 起一汤匙油锅爆香适量碎蒜,加入调味料A和川烫好的伊面快炒均匀,捞起放入电饭锅里面保温。

2. 接着把锅再加入1汤匙的油把蒜葱碎炒香,加入所有材料(除了花椰菜,鸡蛋液和栗粉水)和调味料B煮滚。

3. 然后加入栗粉水勾芡,再次煮滚时快快把蛋液分散倒入锅里才能看到蛋花,再次煮沸后即可关火。把适量的伊面放入盘里,再淋上已经煮好料多多的滑蛋汤汁即可趁热享用啦。

***材料可以根据自家有的自行调整。

Creamy Egg Sauce Yee Mee

{Ingredients} Yee Mee x 6 pcs (pre-cook with boiling water for 2 mins, drain well and set aside), chopped garlic, chopped shallots, scallops meat x 3 (sliced),some seafood tofu and vegetarian small prawn (sliced), minced chicken (marinate with some soy sauce, pepper and sesame oil for 5 mins), shredded king oyster mushroom, shredded cabbage, cauliflower / broccoli (blanch over with hot boiling water that add with some salt and olive oil for 2-3 mins, drain well and set aside), shredded carrots, eggs x 4 (beaten with some sesame oil and pepper), corn starch solution (3 tbsp of corn starch and 3 tbsp of water, mix them well and set aside).

{Seasonings A-Yee Mee} Black soy sauce x 5 tbsp, soy sauce x 2 tbsp, water x 2 tbsp.

{Seasonings B-Sauce} Water x 800-1000ml, abalone sauce x 1 tbsp, Shaoxing wine x 1 tbsp, soy sauce x 2 tbsp, few drops of black soy sauce, brown sugar x 1 tsp, sesame oil x 1 tsp, some pepper. (Mix all well and set aside).

{Directions}

1. Heat up 1 tbsp of oil to sauté chopped garlic, follow by add in seasonings A and the cooked yee mee to stir-fry till well combined, then put in rice cooker to keep it warm.

2. Then, add in another 1 tbsp of oil to sauté chopped garlic and shallot till fragrant, add in all other ingredients (except cauliflower/broccoli, egg mixture and corn starch solution) and seasonings B and bring it to boil.

3. Add in corn starch solution, bring it to boil again only pour in the egg mixture evenly to make creamy gravy, bring it to boil only turn off the stove. Put some yee mee on the serving plate, pour over with right amount of creamy egg sauce that just cooked, serve it hot!

***Ingredients can be very flexible according to your “stocks” availability.

Previous:米奇香蕉薄饼 Mickey's Banana Pancake

Sunday, May 3, 2020

米奇香蕉薄饼 Mickey's Banana Pancake


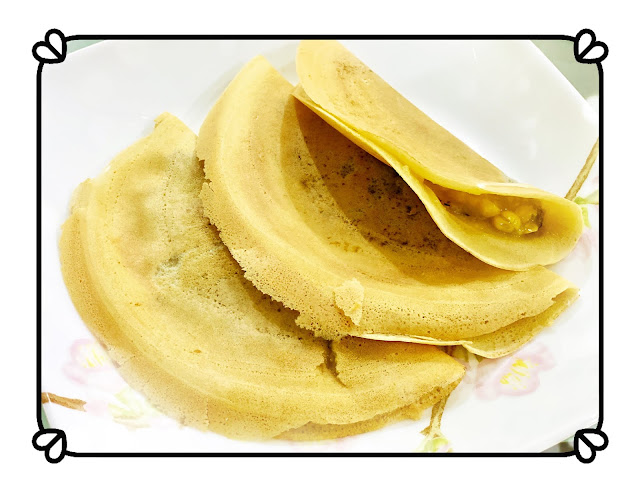
米奇香蕉薄饼 Mickey's Banana Pancake
一条熟透的香蕉可以做出天使们午晚餐的量。
简单但有点小心思的摆盘就可以让她们开心很久很久,哈哈哈!
小小厨师上线,为的是自己喜爱的Mickey造型的香蕉pancake...
依旧是提倡少糖少盐的家庭味...有了天使后,我家口味被我“硬生生”地变得更“健康”些啦。她们目前为止依然很热爱当我的厨房小帮手,反而是我嫌她们把厨房挤窄了...当然这样的亲子互动我是在不赶时间的状态下才能完全享受咯。MCO期间增多了这些体验的机率确实是不错的“回忆”!

米奇香蕉薄饼

{材料} 熟透香蕉一条 (用叉子按碎后滴几滴柠檬汁防氧化变黑-没有不放也行),面粉10汤匙, 鸡蛋1粒, 清水适量(大约75-100毫升,看个人喜爱的黏稠度。)

{调味料} 黄糖 ½ 汤匙,盐一小撮,无盐奶油适量。

{做法}

1. 全部材料和调味料(除了无盐奶油)拌均,放置30分钟左右再加入香蕉泥拌均搅拌均匀。

2. 平底锅里加入1/2茶匙无盐奶油,放入米奇造型器再倒入适量的面糊,双面煎成微黄色即可。(重复此步骤直到面糊用完或将用不完的面糊冷藏但要在三天内用完。)

Mickey's Banana Pancake
{Ingredients} Ripe banana x 1 (Mashed), flour x 10 tbsp, eggs x 1, some water (about 75-100 ml, according to thickness preference.)

{Seasonings} Brown sugar x ½ tbsp, a pinch of salt, some unsalted butter.

{Directions}

1. Mix all ingredients and seasonings (except unsalted butter) well, put aside for 30 mins only continue to stir well with mashed banana until get a smooth batter.

2. Then, add in ½ tsp of unsalted butter, ready with mickey’s shaper and pour in the right amount of batter, fry till both side lightly golden yellow. Remember to serve hot. (Repeat this step till all batter is finished else refrigerate the remaining batter and use in 3 days)

Previous: 鸡肉水煮蛋小汉堡 Mini Chicken Egg Burger

Saturday, May 2, 2020

鸡肉水煮蛋小汉堡 Mini Chicken Egg Burger


鸡肉水煮蛋小汉堡 Mini Chicken Egg Burger
自制小汉堡鸡肉块,天使们吃得津津有味,妈咪也放心!


天使们爱极了这小汉堡,还不停地说我们终于吃到妈咪做的burger啦...怪我做慢了?!
明明之前贪快,做了无数次快手版芝士水煮鸡蛋片迷你汉堡啊,有时还加番茄片或蔬菜片,就是没加过自制的鸡肉块而已嘛...由于难得有“多余”的时间,又不想她们吃太多快餐,心血来潮自制汉堡鸡肉块来完成天使们想吃整粒burger的愿望😆呵呵。年纪小小,胃口好到爆,一直想吃和大人们一模一样的东西😓。所以说,还是要控制住她们的食量,不然又要面对消化不良的“烦”囖。

鸡肉水煮蛋小汉堡

{材料} 小餐包2,鸡肉碎6汤匙左右(用一点小红葱碎,酱油,胡椒粉和芝麻油腌5分钟),水煮鸡蛋2片,车打芝士1片(切成4小片),小黄瓜2片。

{做法}

1. 全部材料准备好后,起1茶匙橄榄油锅,把鸡肉碎用汤匙压成差不多圆形鸡肉片,煎至两面熟即可。

2. 小餐包切开但别切断,依序先放一片小黄瓜,芝士小片煎好的鸡肉块,再放小芝士片和鸡蛋片即可享用咯。

Mini Chicken Egg Burger

{Ingredients} Dinner roll x 2, minced chicken x 6 tbsp (marinate with some chopped shallots, soy sauce, pepper and sesame oil) for 5 mins), hard boild egg slices x 2, cheddar cheese x 1 (cut into 4 small pcs), Japanese cucumber slices x 2.

{Directions}

1. Get ready all the ingredients, heat up 1 tsp olive oil to fry the marinated chicken patties till cooked.

2. Cut the dinner roll but don’t cut all, arrange the ingredients start by a slice of cucumber, follow by cheese slice, then cooked chicken patties, then again another slice of cheddar cheese and egg slice.

Previous:黑糖香蕉蛋糕 Brown Sugar Banana Cake

Featured Post

拥有对自己足够的心安与偏爱 Create Something That Unique to Us

  一个男女人的命, 是可以靠读书去改变的。 你读到的每一本书, 掌握的每一种智慧, 都是成为改命的底牌和资本。 生活是没有捷径的,它考验的是你的恒心与耐力。 只要你对自己狠一点,坚持得久一点, 未来就会变得可控,想要的生活也会触手可及。 享受爱你的人给你的爱的时候,也花时间塑造...